Whether you’re fishing once a year on holidays, or hitting the water every week, fish handling is an essential skill in every angler’s kit. And before you say, “I’m keeping it for dinner anyway”, planning to keep every fish isn’t a plan. Especially when there’s chance of no-take species and fish outside legal size limits.
This article will guide you through basic fish handling, the optimal dispatch technique, and best practices for catch and release.
General handling tips
When handling fish, the goal is to minimise airtime and reduce contact, some of which starts well before you’ve made your first cast.
Every time you go fishing you need to be prepared to release fish. Having the right tools at hand (more on this later), your measure set up and your camera handy goes a long way in avoiding the scramble when your new PB hits the net.
Step one: suppress the universal desire to launch your fish into the boat immediately upon netting. Take 30 seconds to get your ducks in a row, and get set up for a quick photo and release. This gives both you and the fish a chance to catch your breath.
Leave your fish submerged in the net while you get your measure and camera ready
Start by wetting your hands and measuring mat before handling. This simple step helps preserve their protective slime coat, which acts as a barrier against infections and parasites.
Avoid using dry towels or rough surfaces, which strip away this essential layer. This includes carpeted boat decks, so either leave your fish in the net or slide them straight onto your wet measuring mat. If you’ve got one, rest your catch in the live well to cut airtime.
Just like us, fish need oxygen, with the catch being theirs is dissolved in water. As soon as they’re out of the water, it’s equivalent to us holding our breath. The average human is going to be uncomfortable after about 30 seconds, with permanent brain damage setting in around the four-minute mark. Next time you land a fish, challenge yourself to hold your breath while it’s out of the water. I guarantee you’ll be surprised how quickly time passes.
Support the fish’s body with both hands (or arms!), to avoid pressure on their skeletal system and internal organs. Remember: fish are used to the buoyancy of water supporting their body weight. When lifting the fish, keep it horizontal to distribute the weight evenly and avoid hanging fish vertically by the jaw.
Essential equipment
Using the right tools can make a significant difference in the survival rate of released fish.
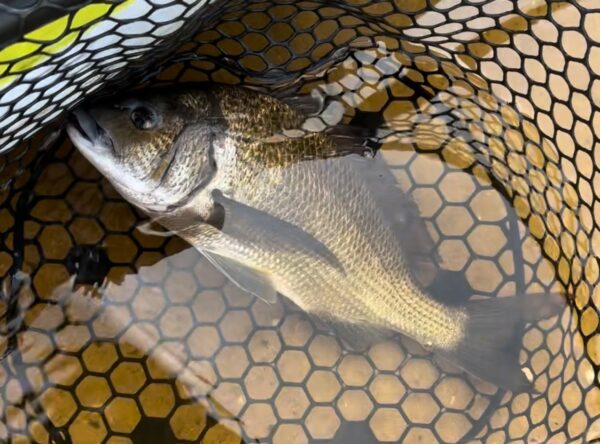
A rubber landing net is gentler on fish than a traditional knotted, nylon net. Ensure you have a net suited to the size of the fish you’re targeting. A big fish shoe-horned into a small net is a recipe for damage.
Fish-friendly gloves can provide a better grip and additional protection for both you and the fish. Avoid fish grips where you can, and when you can’t, opt for the plastic versions that are gentler on fish.
Dehooking devices or pliers are essential for safely removing hooks, especially those that are deeply embedded. Ensure your pliers have a snipping tool (or have wire cutters in your kit), in case you need to cut through a hook.
Barbless hooks or hooks with crimped barbs make unhooking easier and can reduce injury to the fish. Swapping over to single hooks on your lures and using circle hooks while bait fishing also reduces potential for damage. If a fish is deeply hooked, cut the line as close to the hook as possible rather than trying to remove it forcefully.
How to dispatch fish
If you intend to keep a fish for consumption, it’s vital to dispatch it humanely. Quick and effective dispatch not only minimise the fish’s suffering, but also improves the quality of your meal.
The easiest way is to ‘brain spike’ your fish, also known as the ‘Ike Jime’ method. This involves inserting a sharp spike into the fish’s skull, causing immediate brain death. This method stops any flapping, reducing spoilage from lactic acid build up. You can buy specific tools purpose built for the job, noting that your filleting knife is prone to slippage (no one needs a hospital trip).
The general instruction is ‘above and behind the eye’, however each species will differ. Ikjime.com is an excellent resource and has a ‘fish finder’ tool that will show you the spike point for various species. Give it a go and locate the spike point of your target before heading out or download the app to search your species on the go.
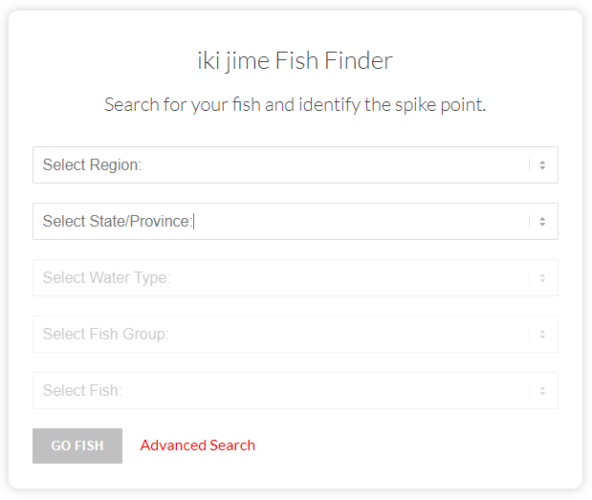
The Fish Finder tool on ikijime.com is a handy way to locate the brain in your target fish species
A firm knock on the head to render the fish unconscious is also endorsed by Australia’s National Code of Practice for Recreational and Sport Fishing.
Once your catch is dispatched, bleed it out by making a cut behind the gills, and get it on ice. Making a slurry by adding a small amount of water to your ice bag or esky speeds the cooling process, resulting in nicer fillets on your plate!
Best practices for catch and release
Catch and release fishing plays a crucial role in conservation, allowing us to enjoy the sport while maintaining fish populations. In addition to what we’ve already discussed, there’s a few extra precautions you can take to improve chances of survival.
Use appropriate tackle: Select gear that allows you to land fish quickly, reducing the time they spend fighting. Prolonged fights can exhaust fish, decreasing their chances of survival upon release. Just like humans, lactic acid builds up when fish are stressed.
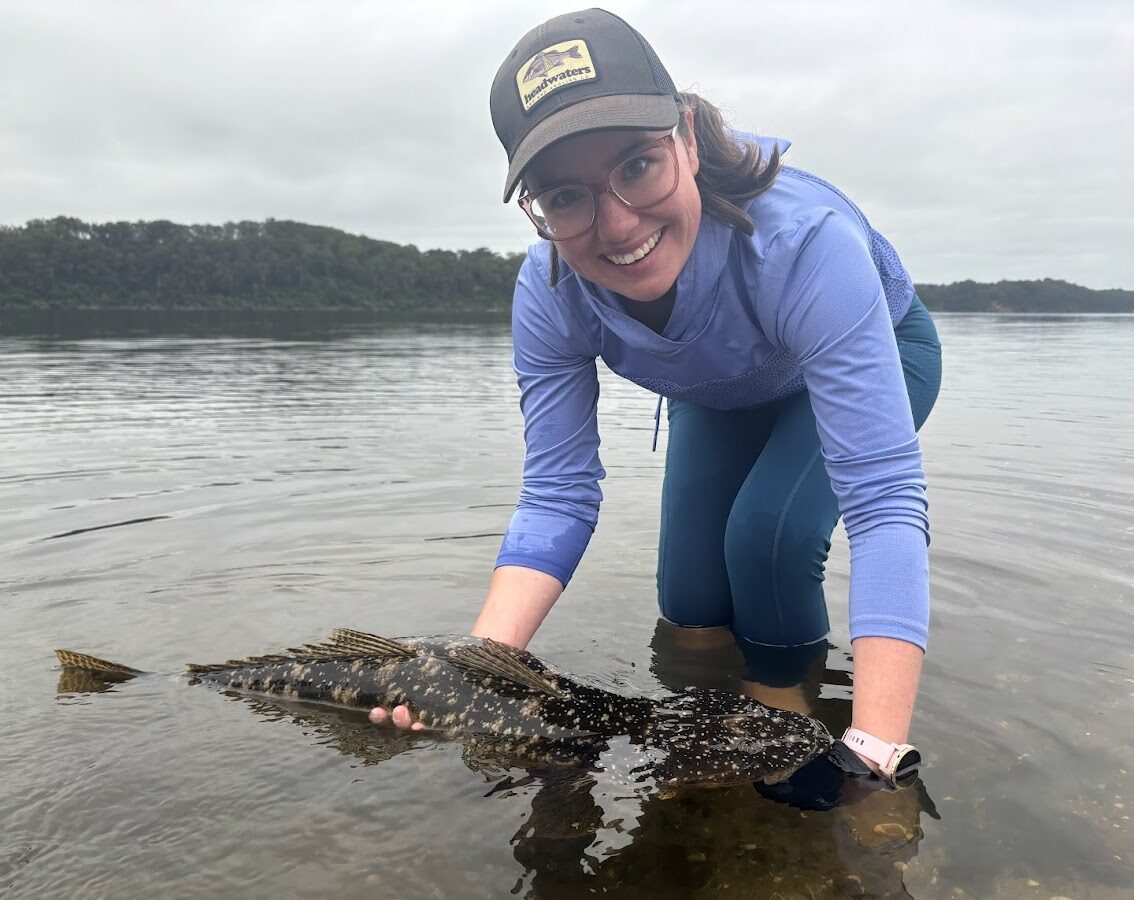
Leave them in the water: Science suggests that fish have the best chance of survival when they’re not removed from the water at all. If you can, jump in the water with the fish for your photos. Have the camera ready, and let your photographer call the shots: 3,2,1… lift and click. This is particularly important for larger bodied species, but also for the bigger models of any species, given they are usually the breeding females.
Reviving the fish: When it’s time for release, hold the fish upright (not on its side) and fully submerge its mouth and gills to achieve maximum water contact. Point the fish into the current to help with water flow. In stillwater situations, you can simulate flow by moving the fish gently in one direction. Avoid pulling the fish back and forth. Water going backwards through their gills is not natural and is an unnecessary stressor. For bigger fish, swimming them slowly using the outboard or electric is also an option. Release the fish when it shows strong swimming movements and can maintain its balance.
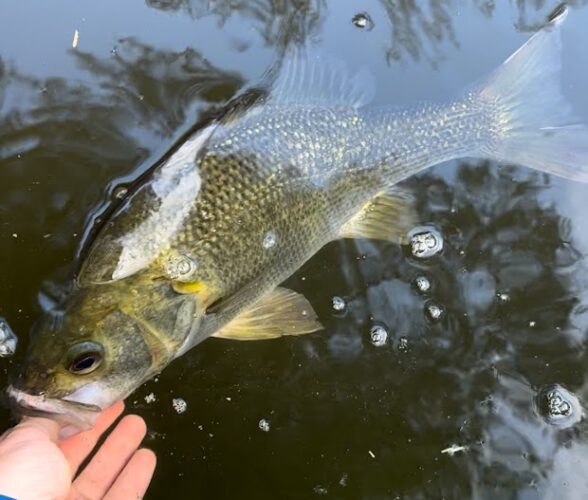
Fully submerging the mouth and gills is essential to revive the fish
For more information on releasing fish, check out Keep Fish Wet, an organisation devoted to educating anglers on best practice for catch and release fishing.
With increasing scrutiny around animal welfare, handling fish safely and humanely is every angler’s responsibility. By following these basic fish handling techniques, and releasing more than you keep, you can help ensure the health and sustainability of fish populations.
Remember, every action you take on the water has an impact, so practice responsible fishing and contribute to the conservation of our sport for future generations to come!